This doc will review the steps clients will need to take to connect their site to Elementor Site Mailer under a paid subscription.
In WordPress Admin:
- Go to Elementor → Settings → Integrations (or Site Mailer section)
- When prompted to connect/log in:
- Log in using the your Elementor account credentials
- Complete the Site Mailer setup
- Client adds billing info in their Elementor dashboard
Completing the Elementor Site Mailer set up will require DNS verification of the sending domain so we can send site emails using the final domain.
If Argyle has access to your domain’s DNS settings, you can send us the records after following the prompts below (at step 12, you’ll send us the records to add to your domain’s DNS records). Otherwise, please send to whomever is responsible for updating the domain’s DNS records.
To add a custom domain:
- Go to WP Admin.

- Navigate to Settings>Site Mailer.
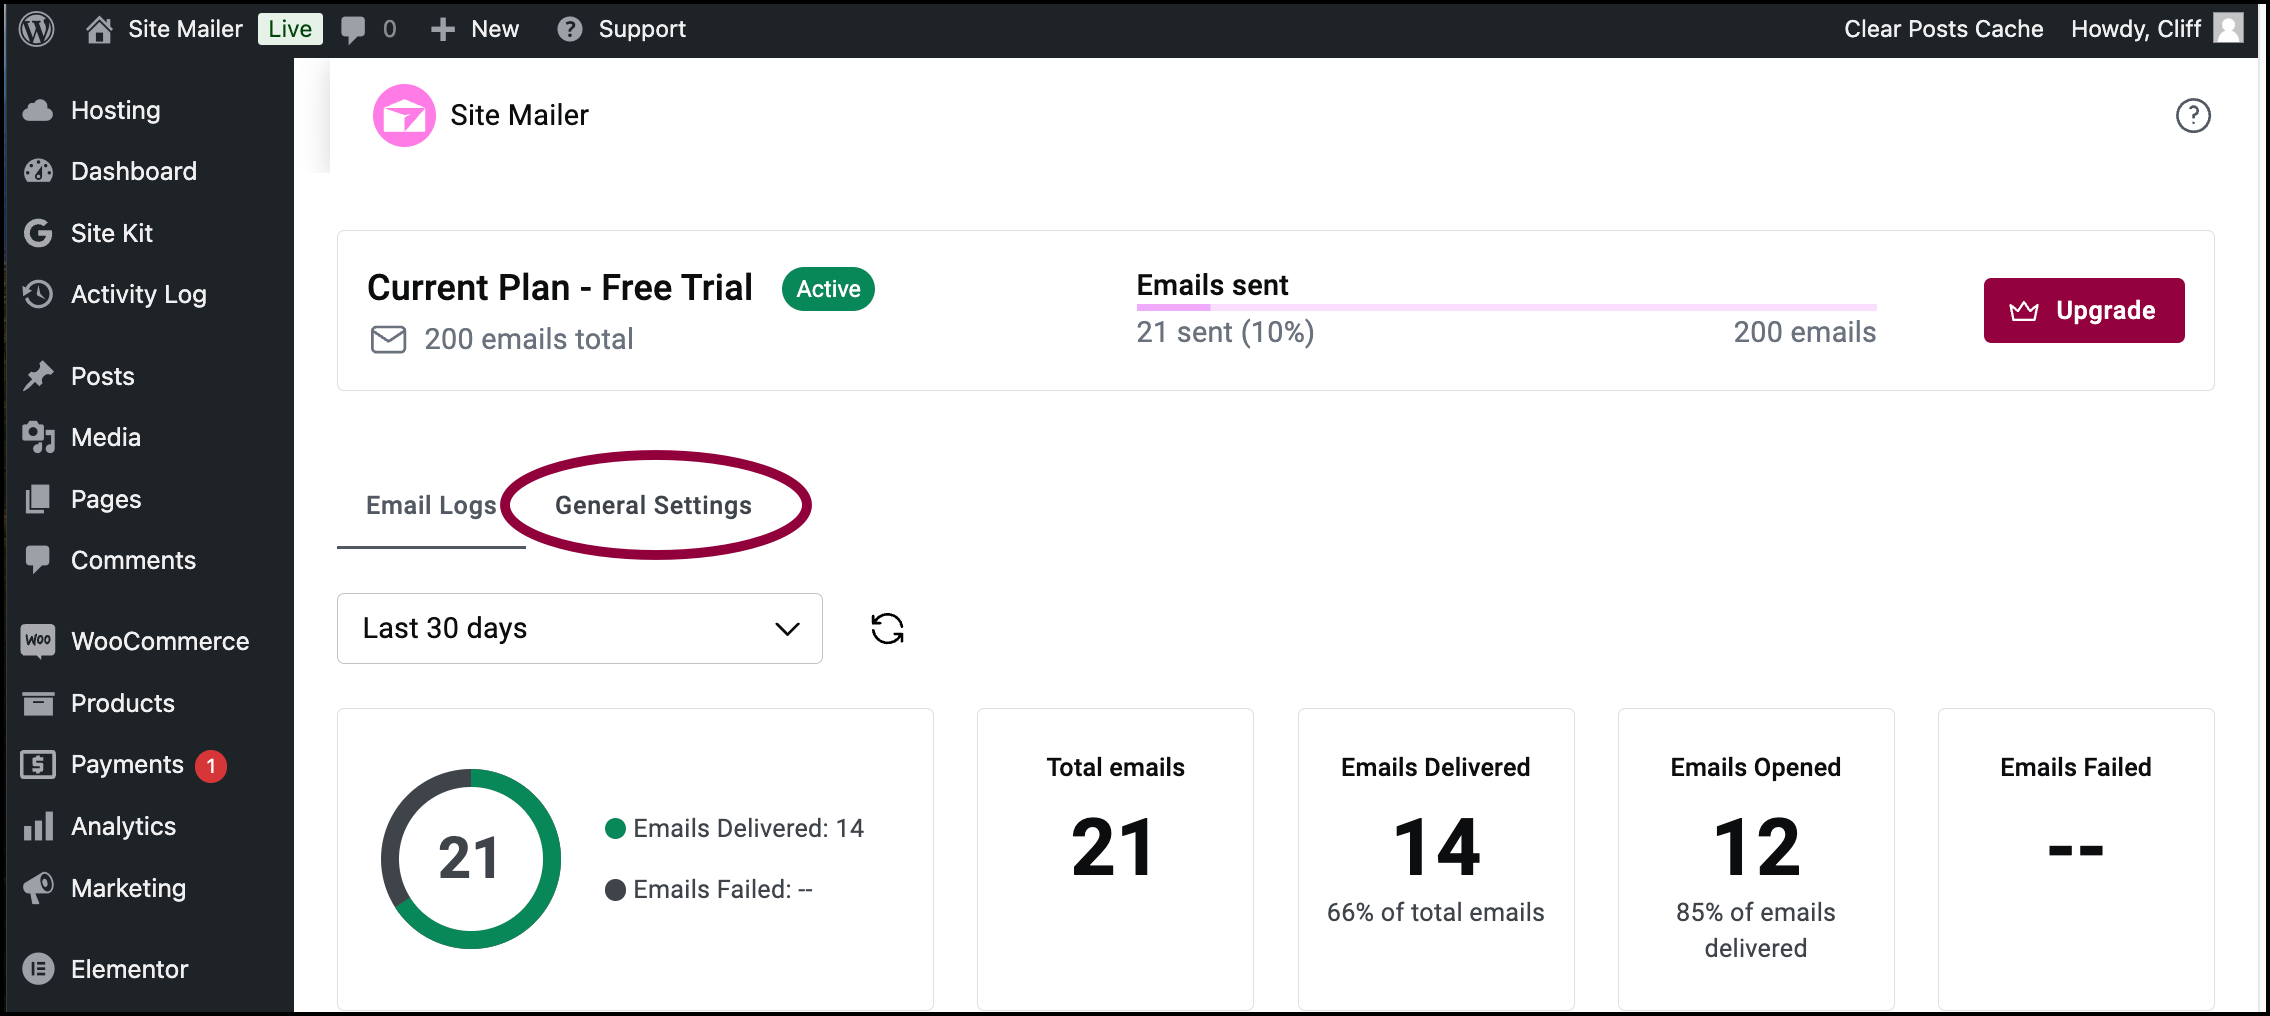
- Click General Settings.
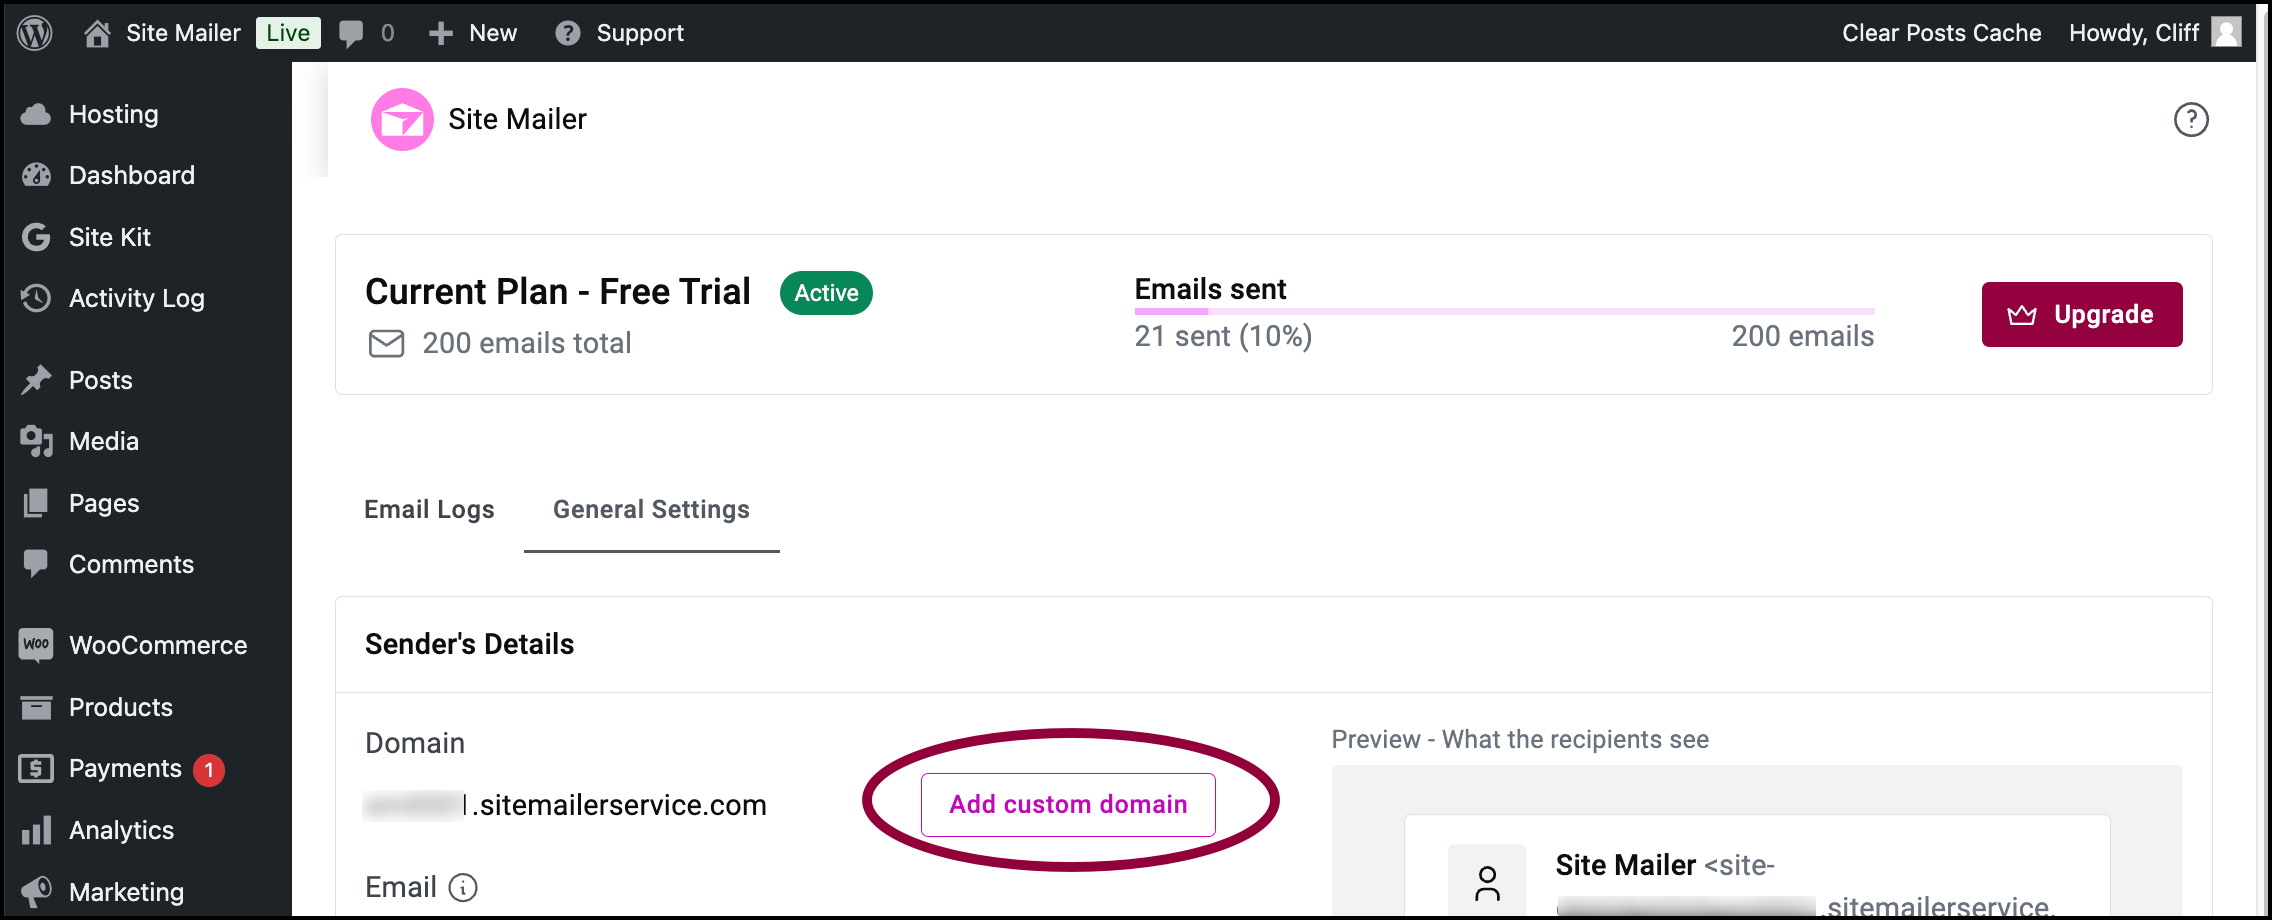
- In the Domain section, click Add custom domain.
Note: To add a custom domain, you’ll need to access your DNS records. These records are stored with your domain name provider – the company you purchased the domain name from. Before beginning this process, make sure you have your login information ready, so you can access their system.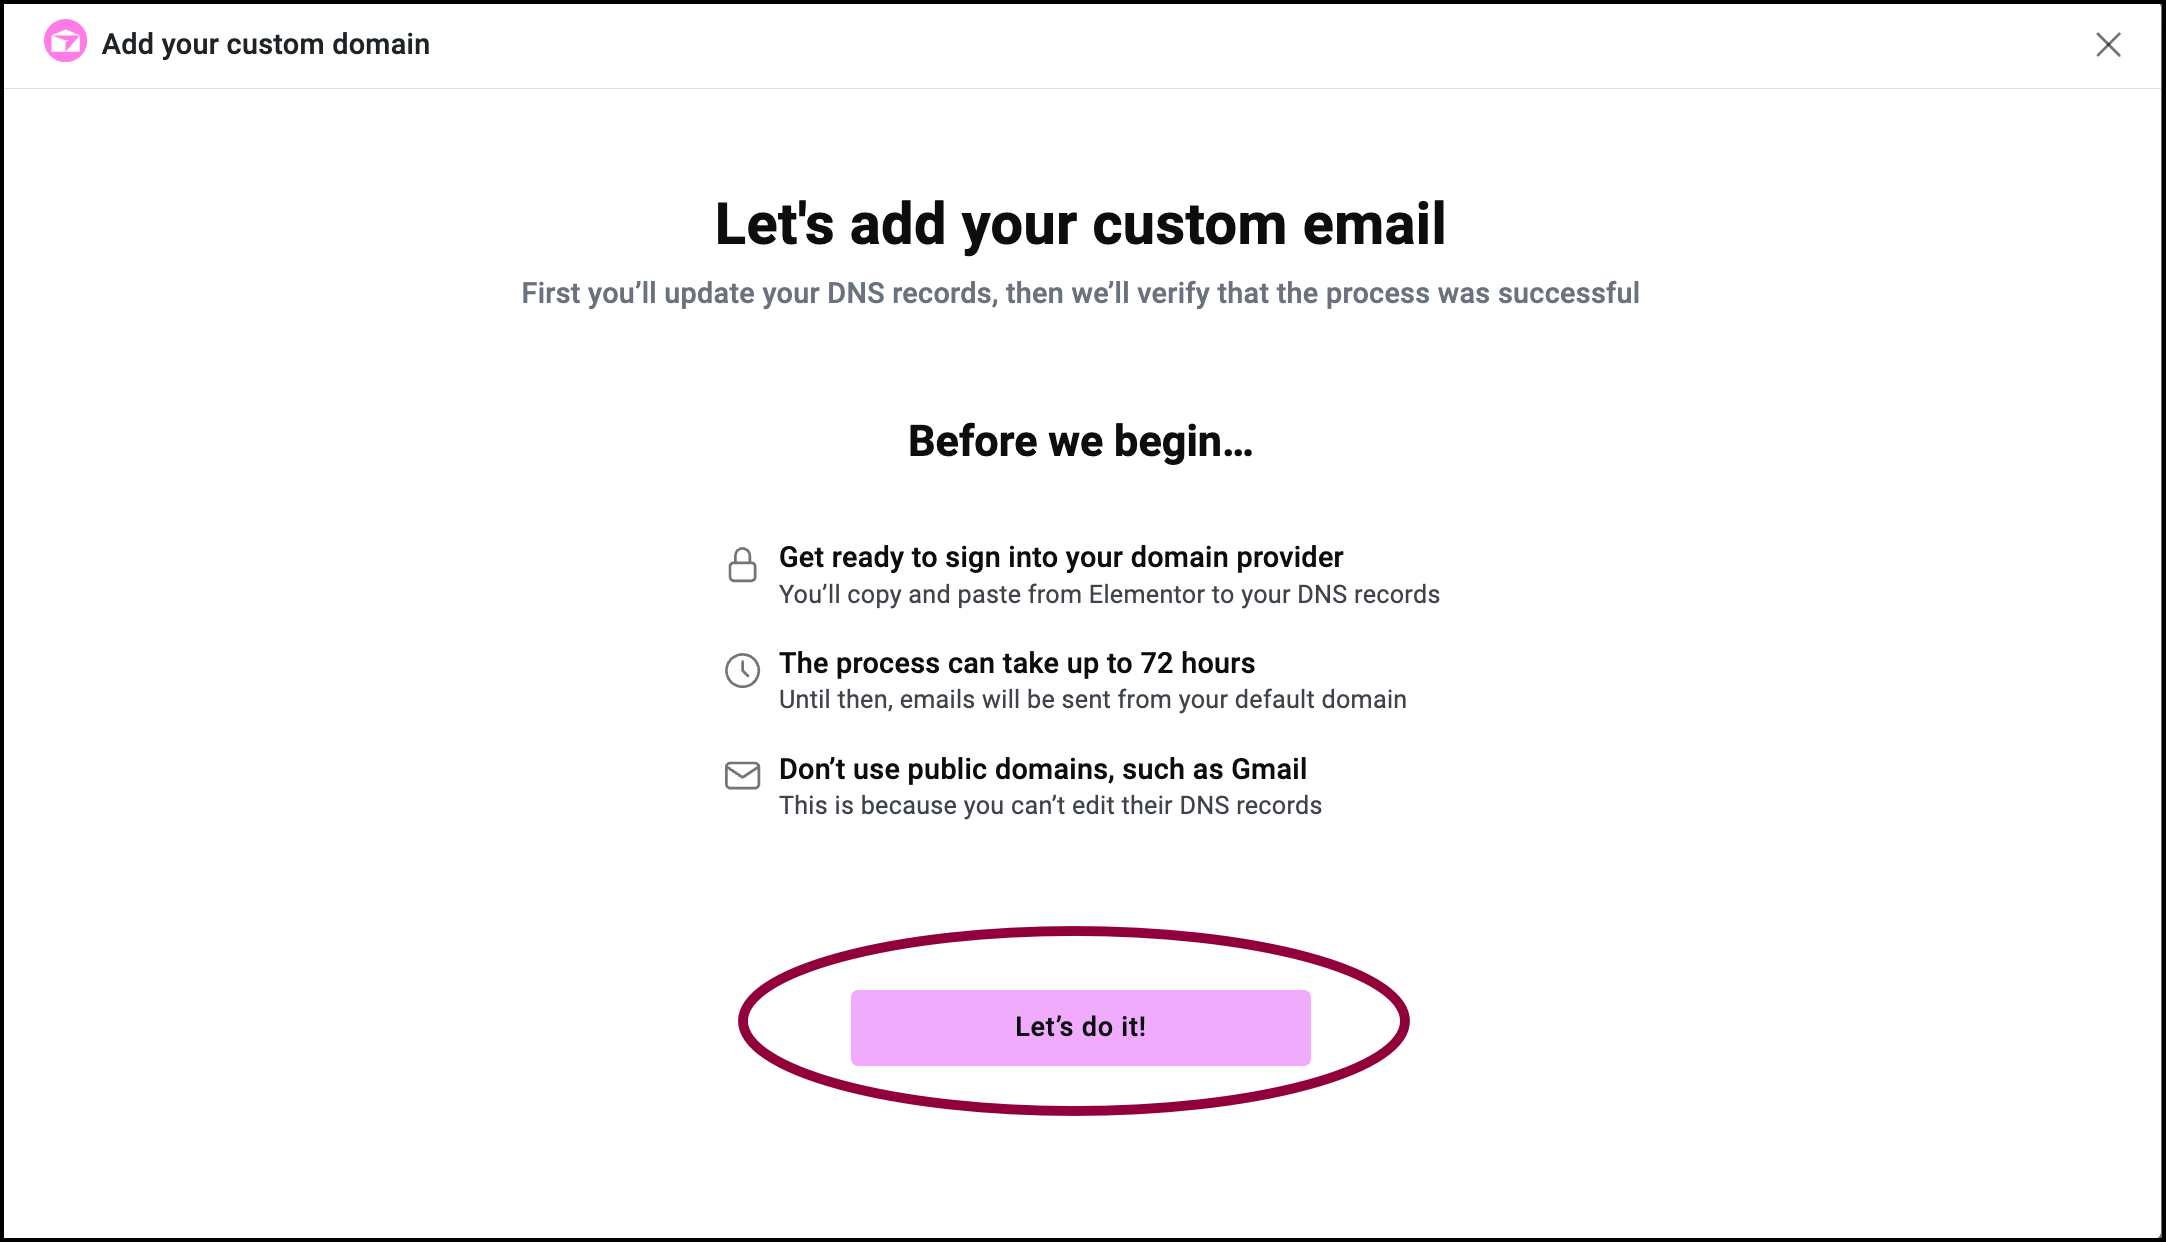
- Read the notes in the popup window and click Let’s do it!
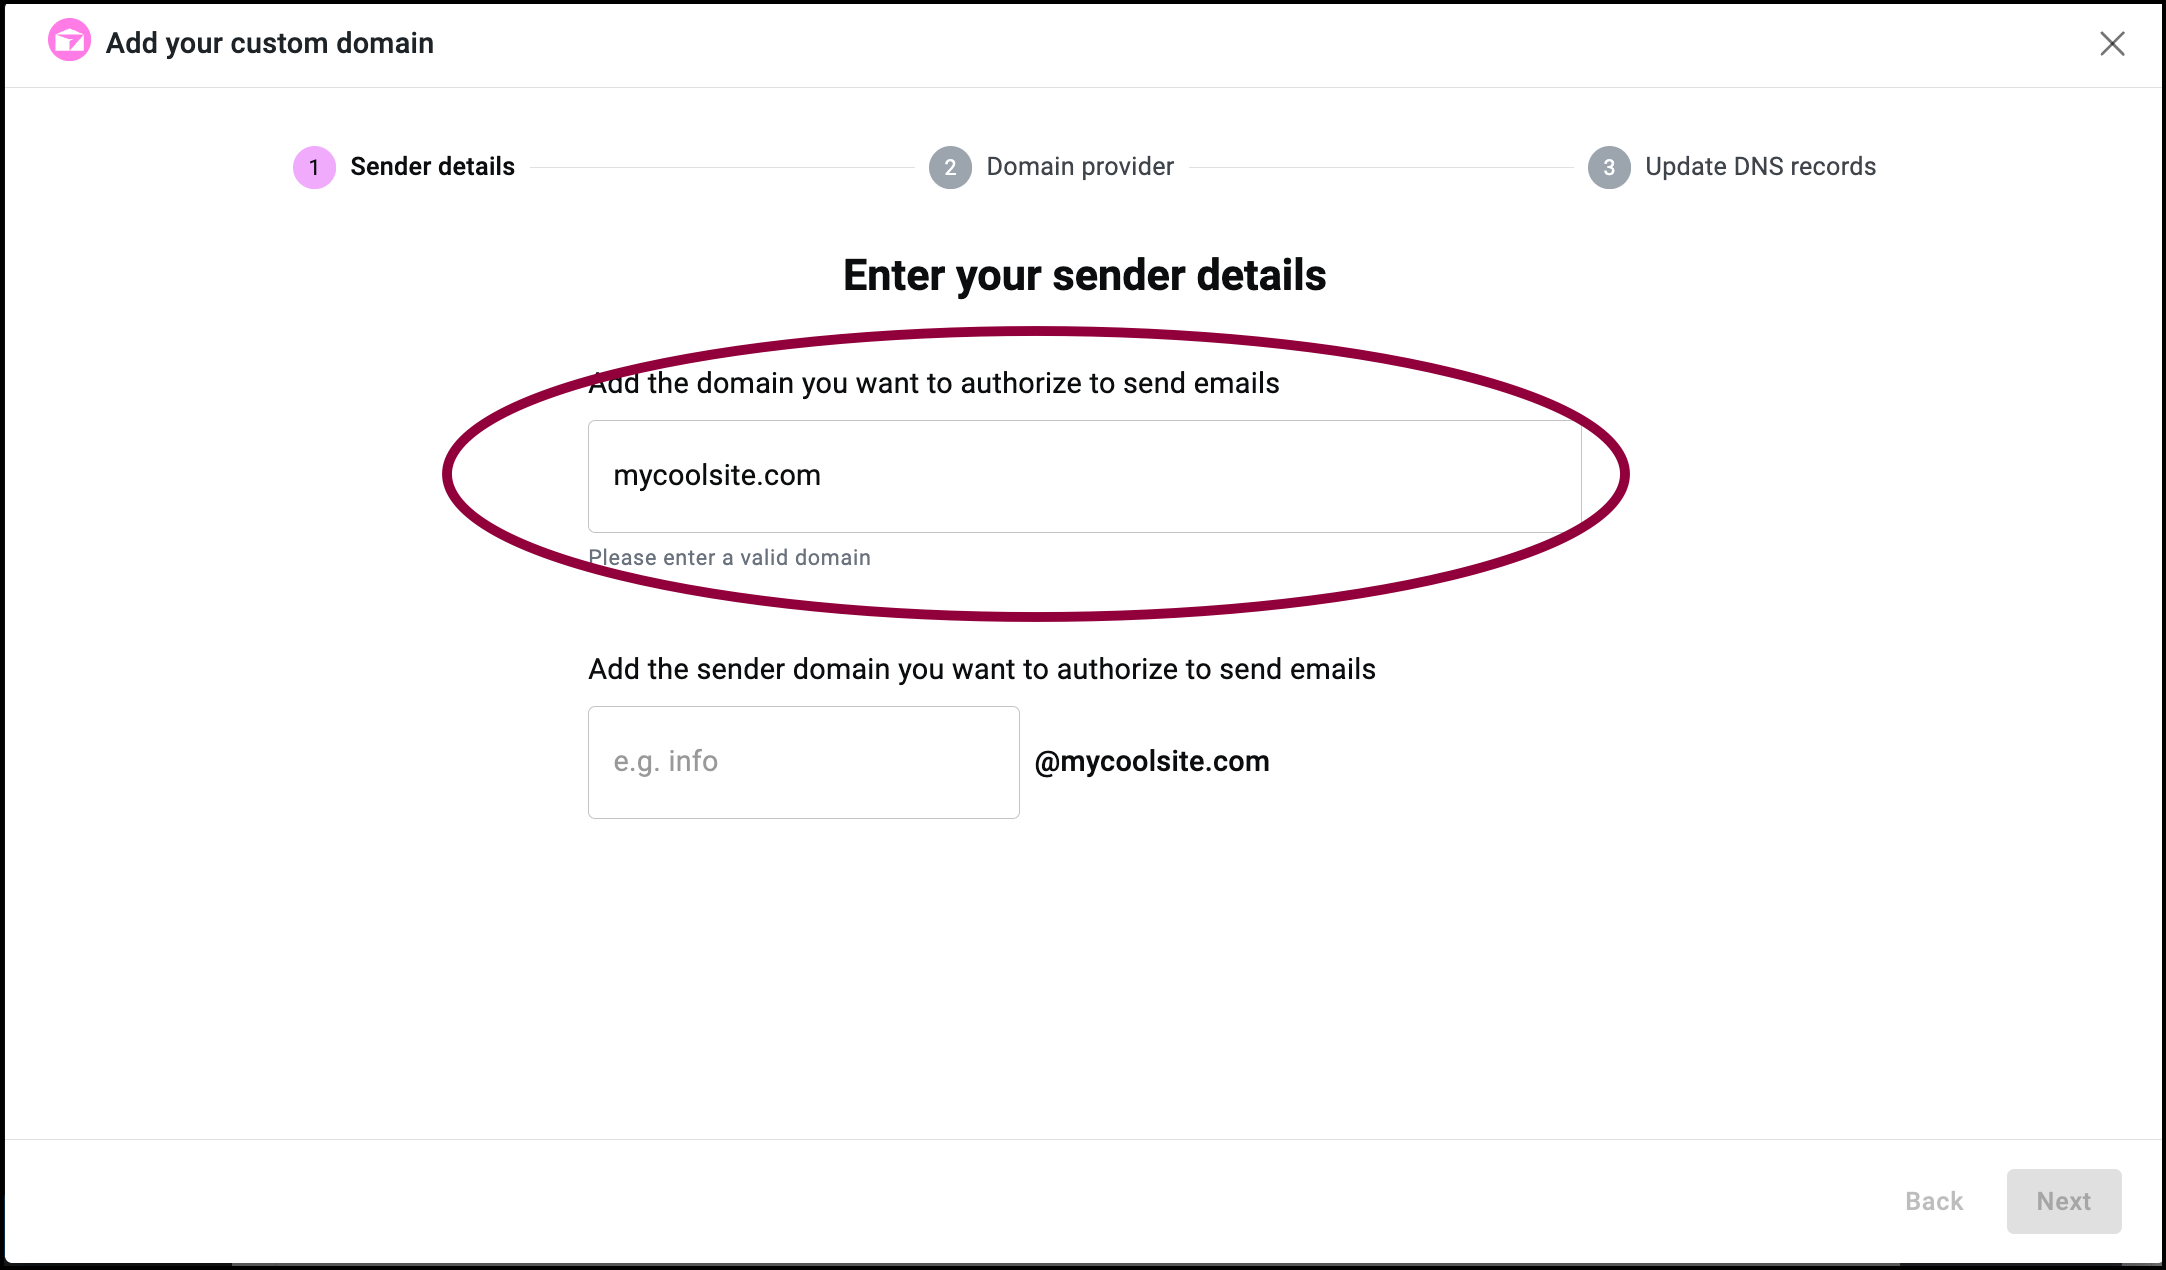
- Enter your domain name (for example, mycoolsite.com) in the domain name text box.
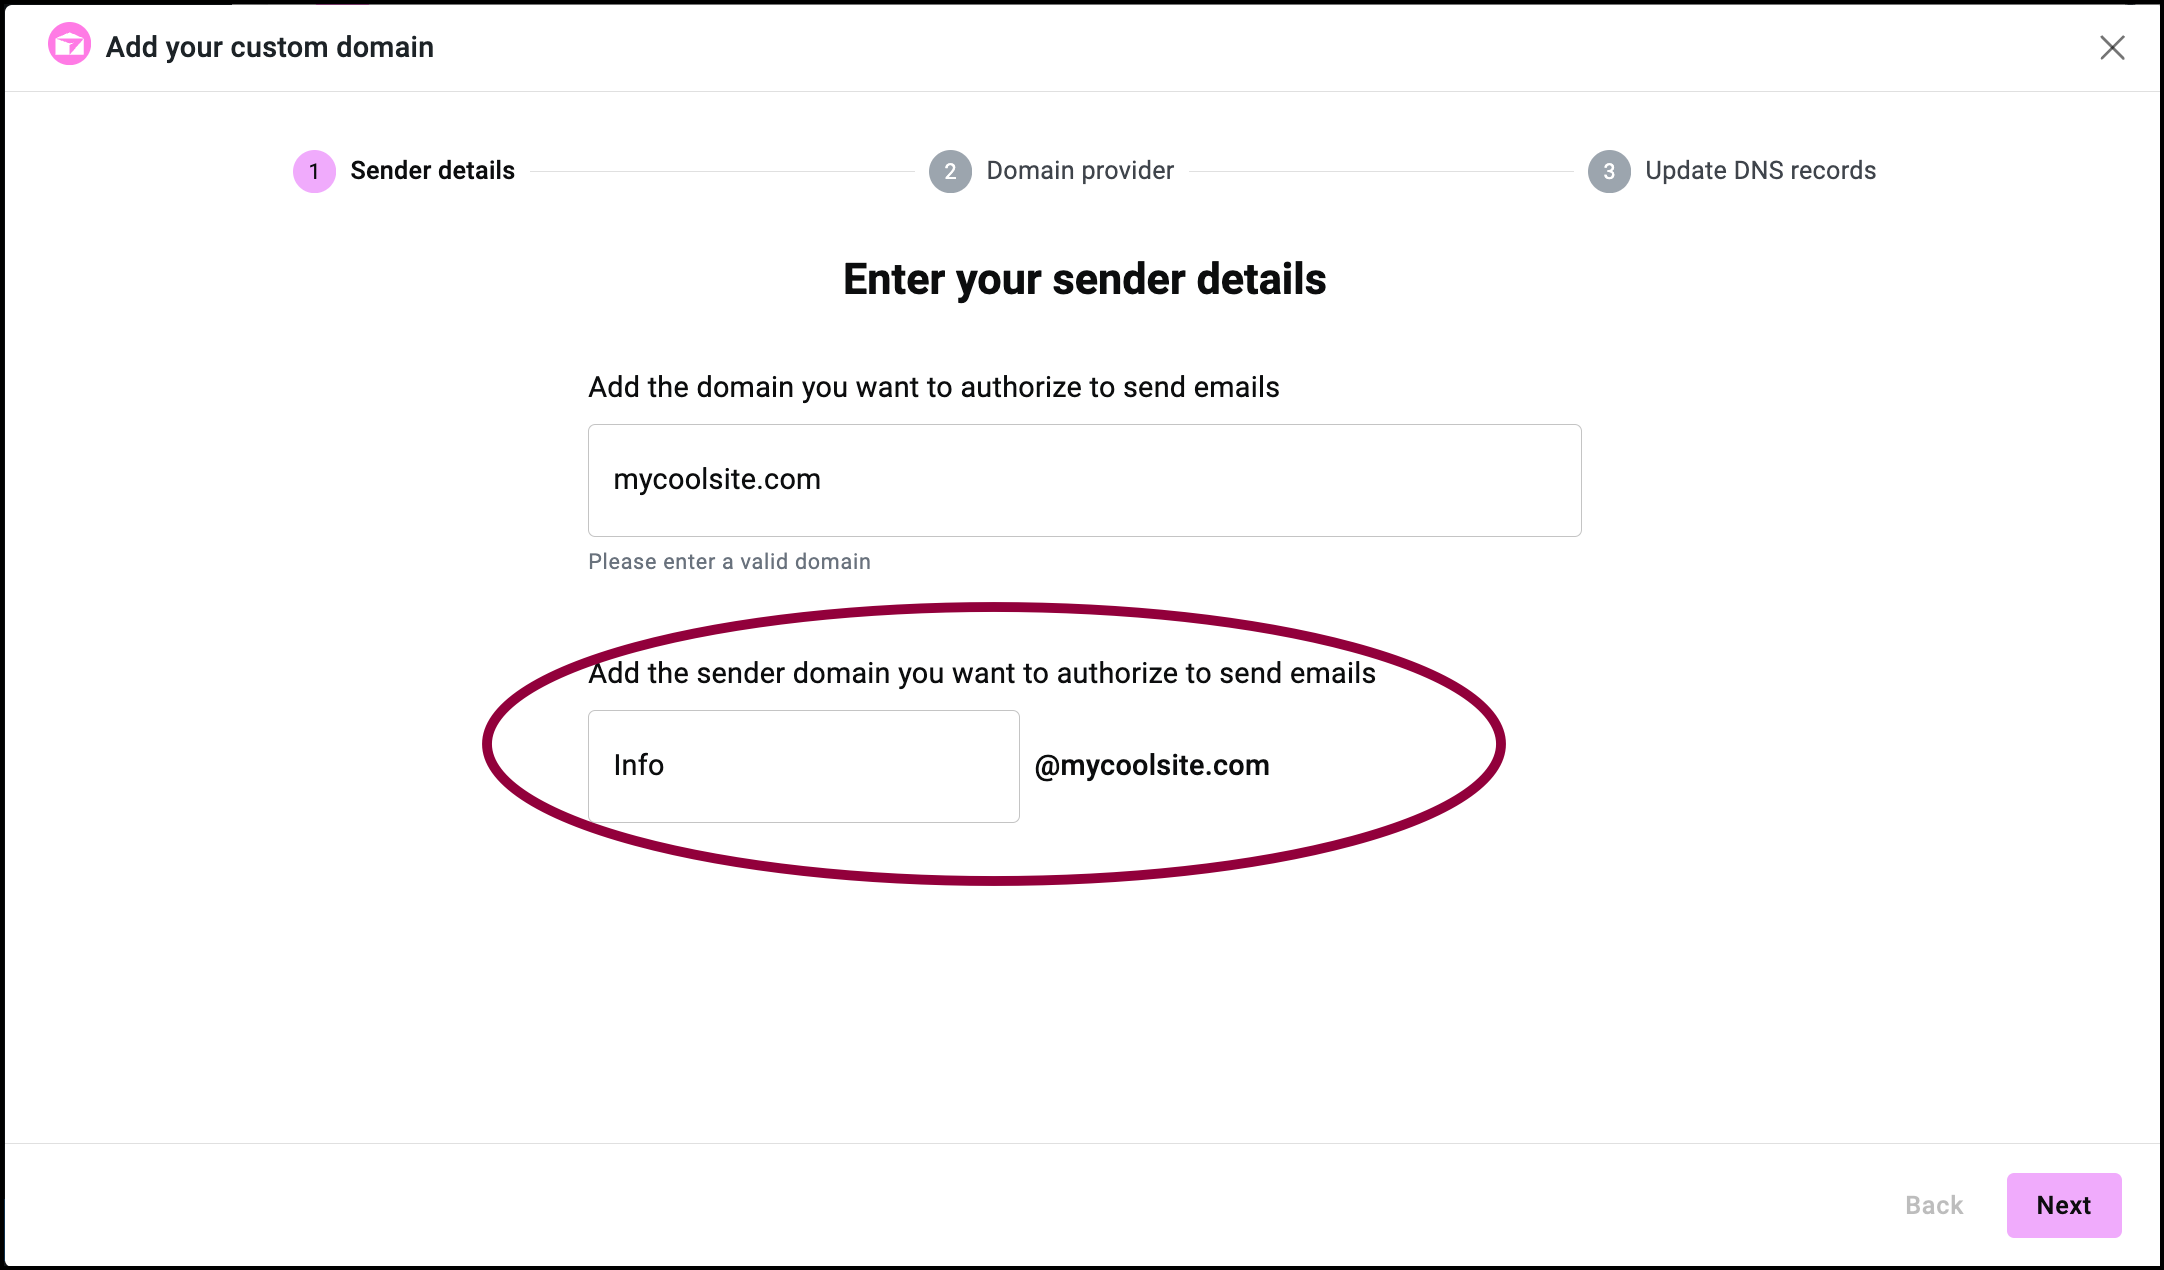
- (Optional) enter a sender name for emails sent by Site Mailer using the custom domain. (for example, Info@mysite.com).
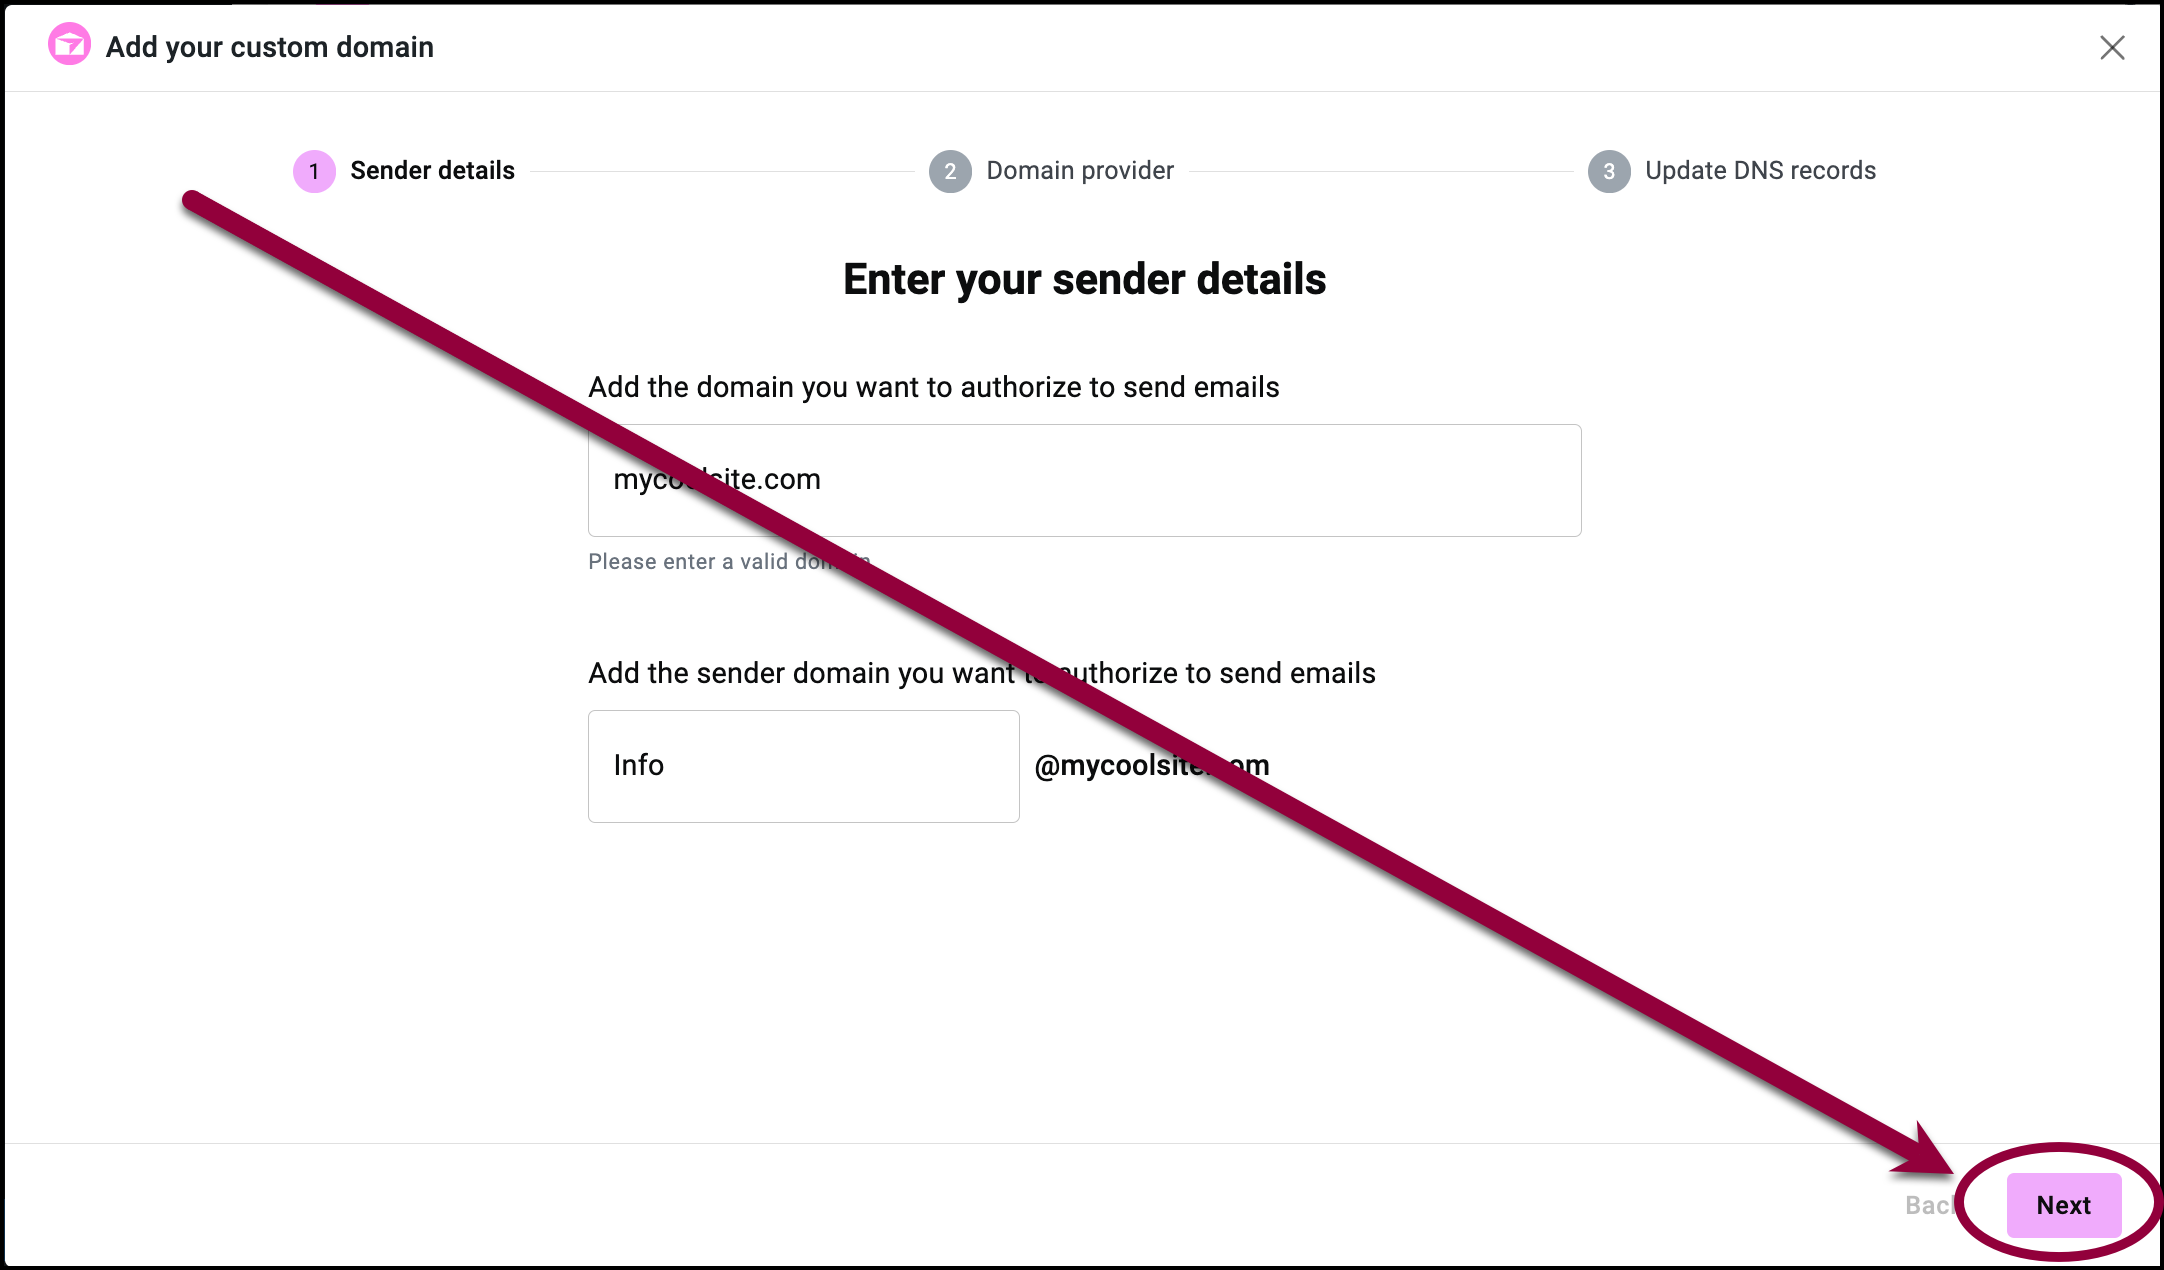
- Click Next.
- If you haven’t done so already, sign in to your domain name provider in a separate browser tab.
Note: Every domain name provider has a different UI. See below for a list of articles detailing how to add records to specific domain providers. However, these are all third parties so we can’t guarantee that these providers will not change their process or UI. - In the tab with your domain name provider’s site, locate the DNS settings for your domain.
- Find the option to manage the DNS settings.
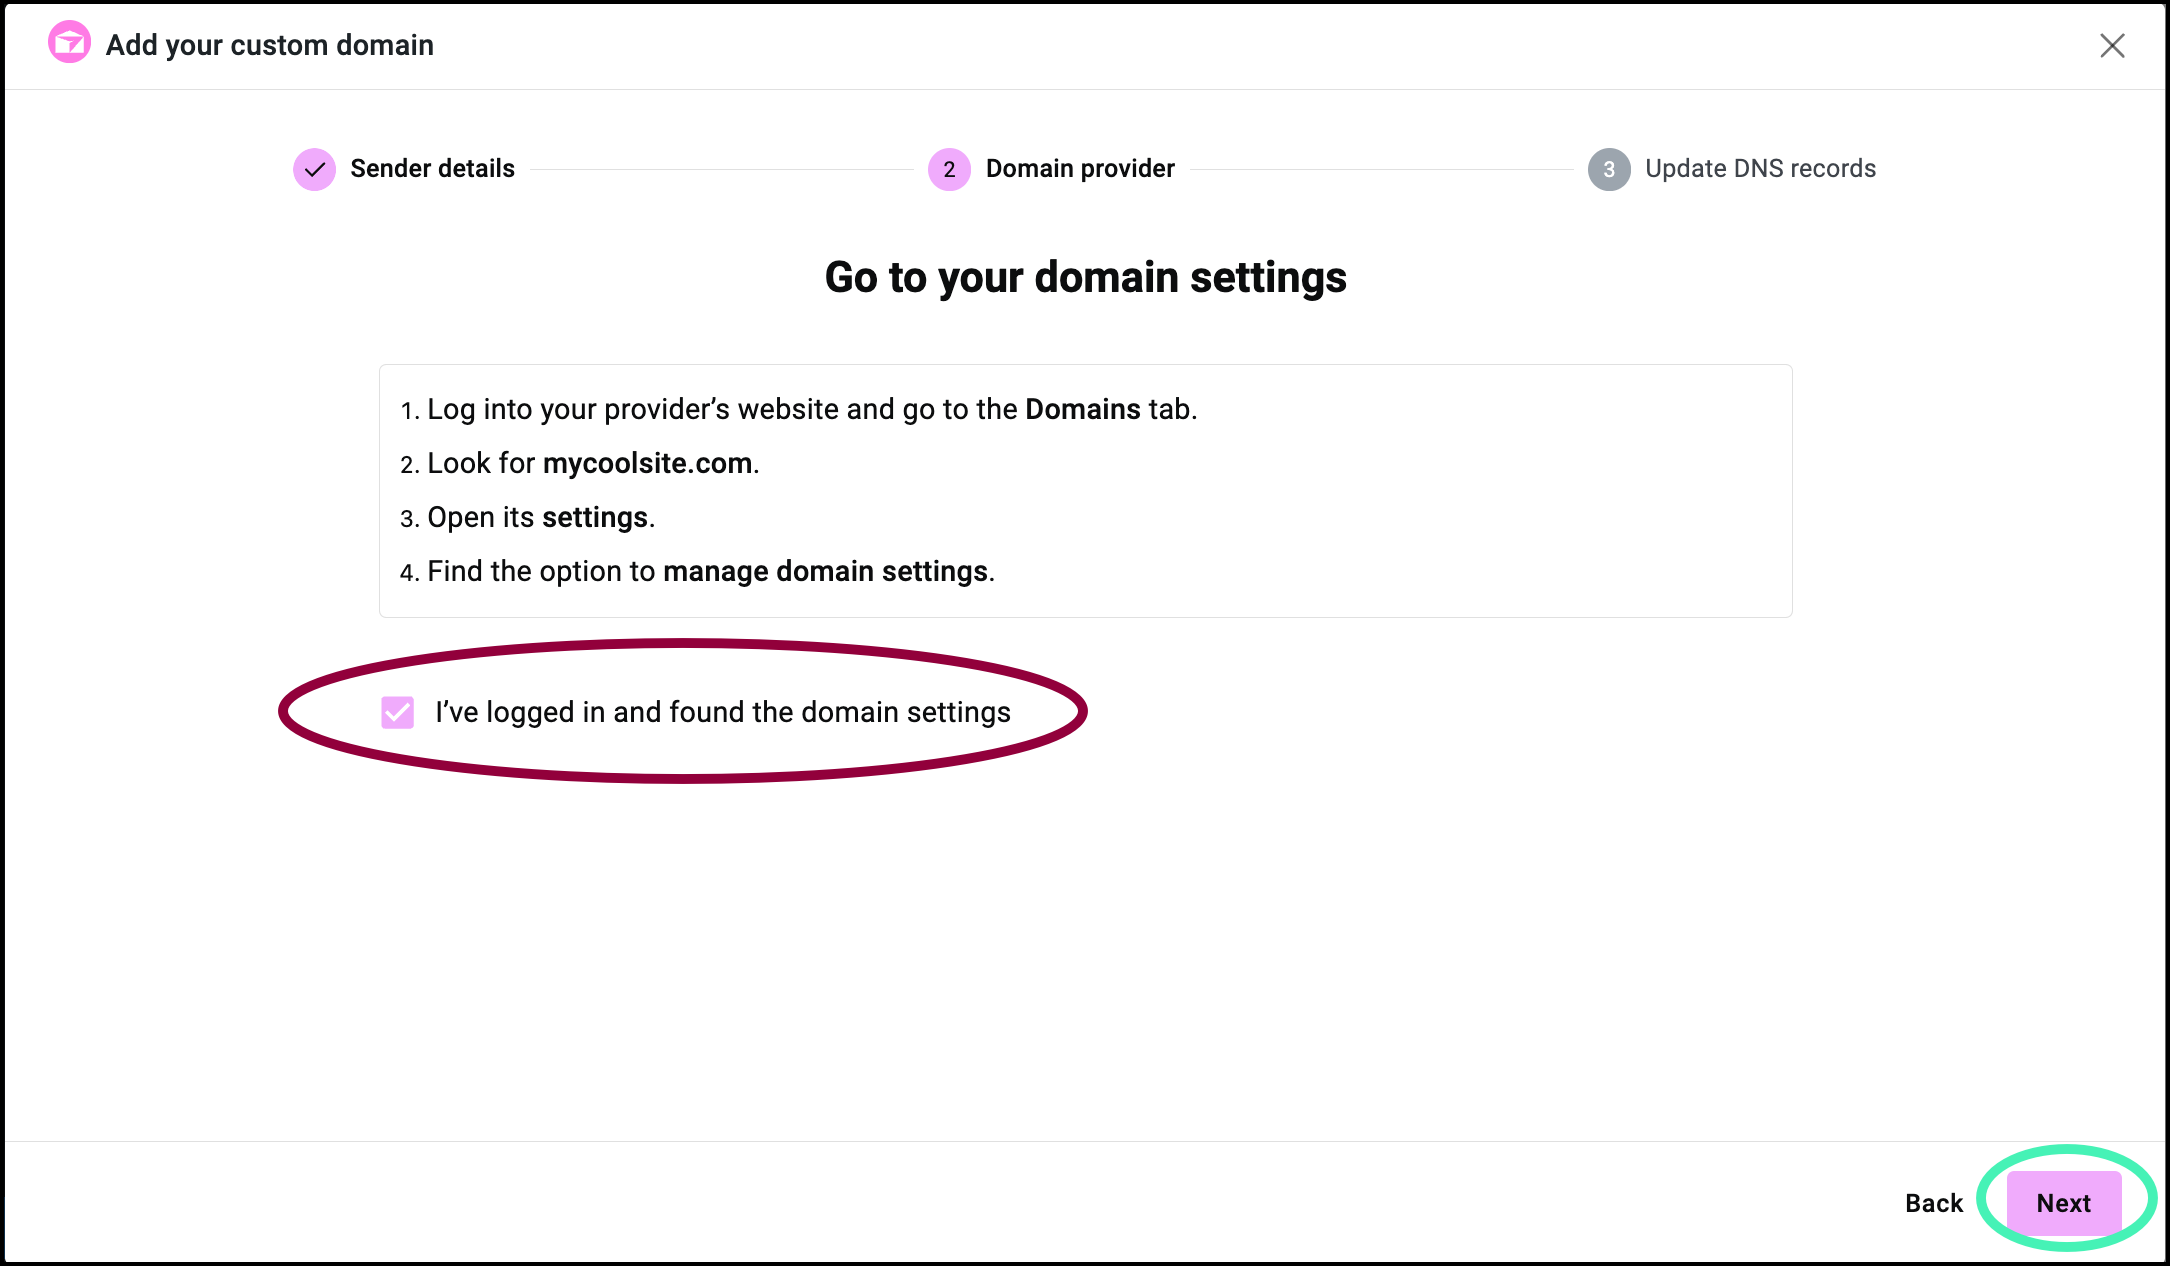
- Return to the tab with Site Mailer, check I’ve logged in and found the domain settings and click Next.

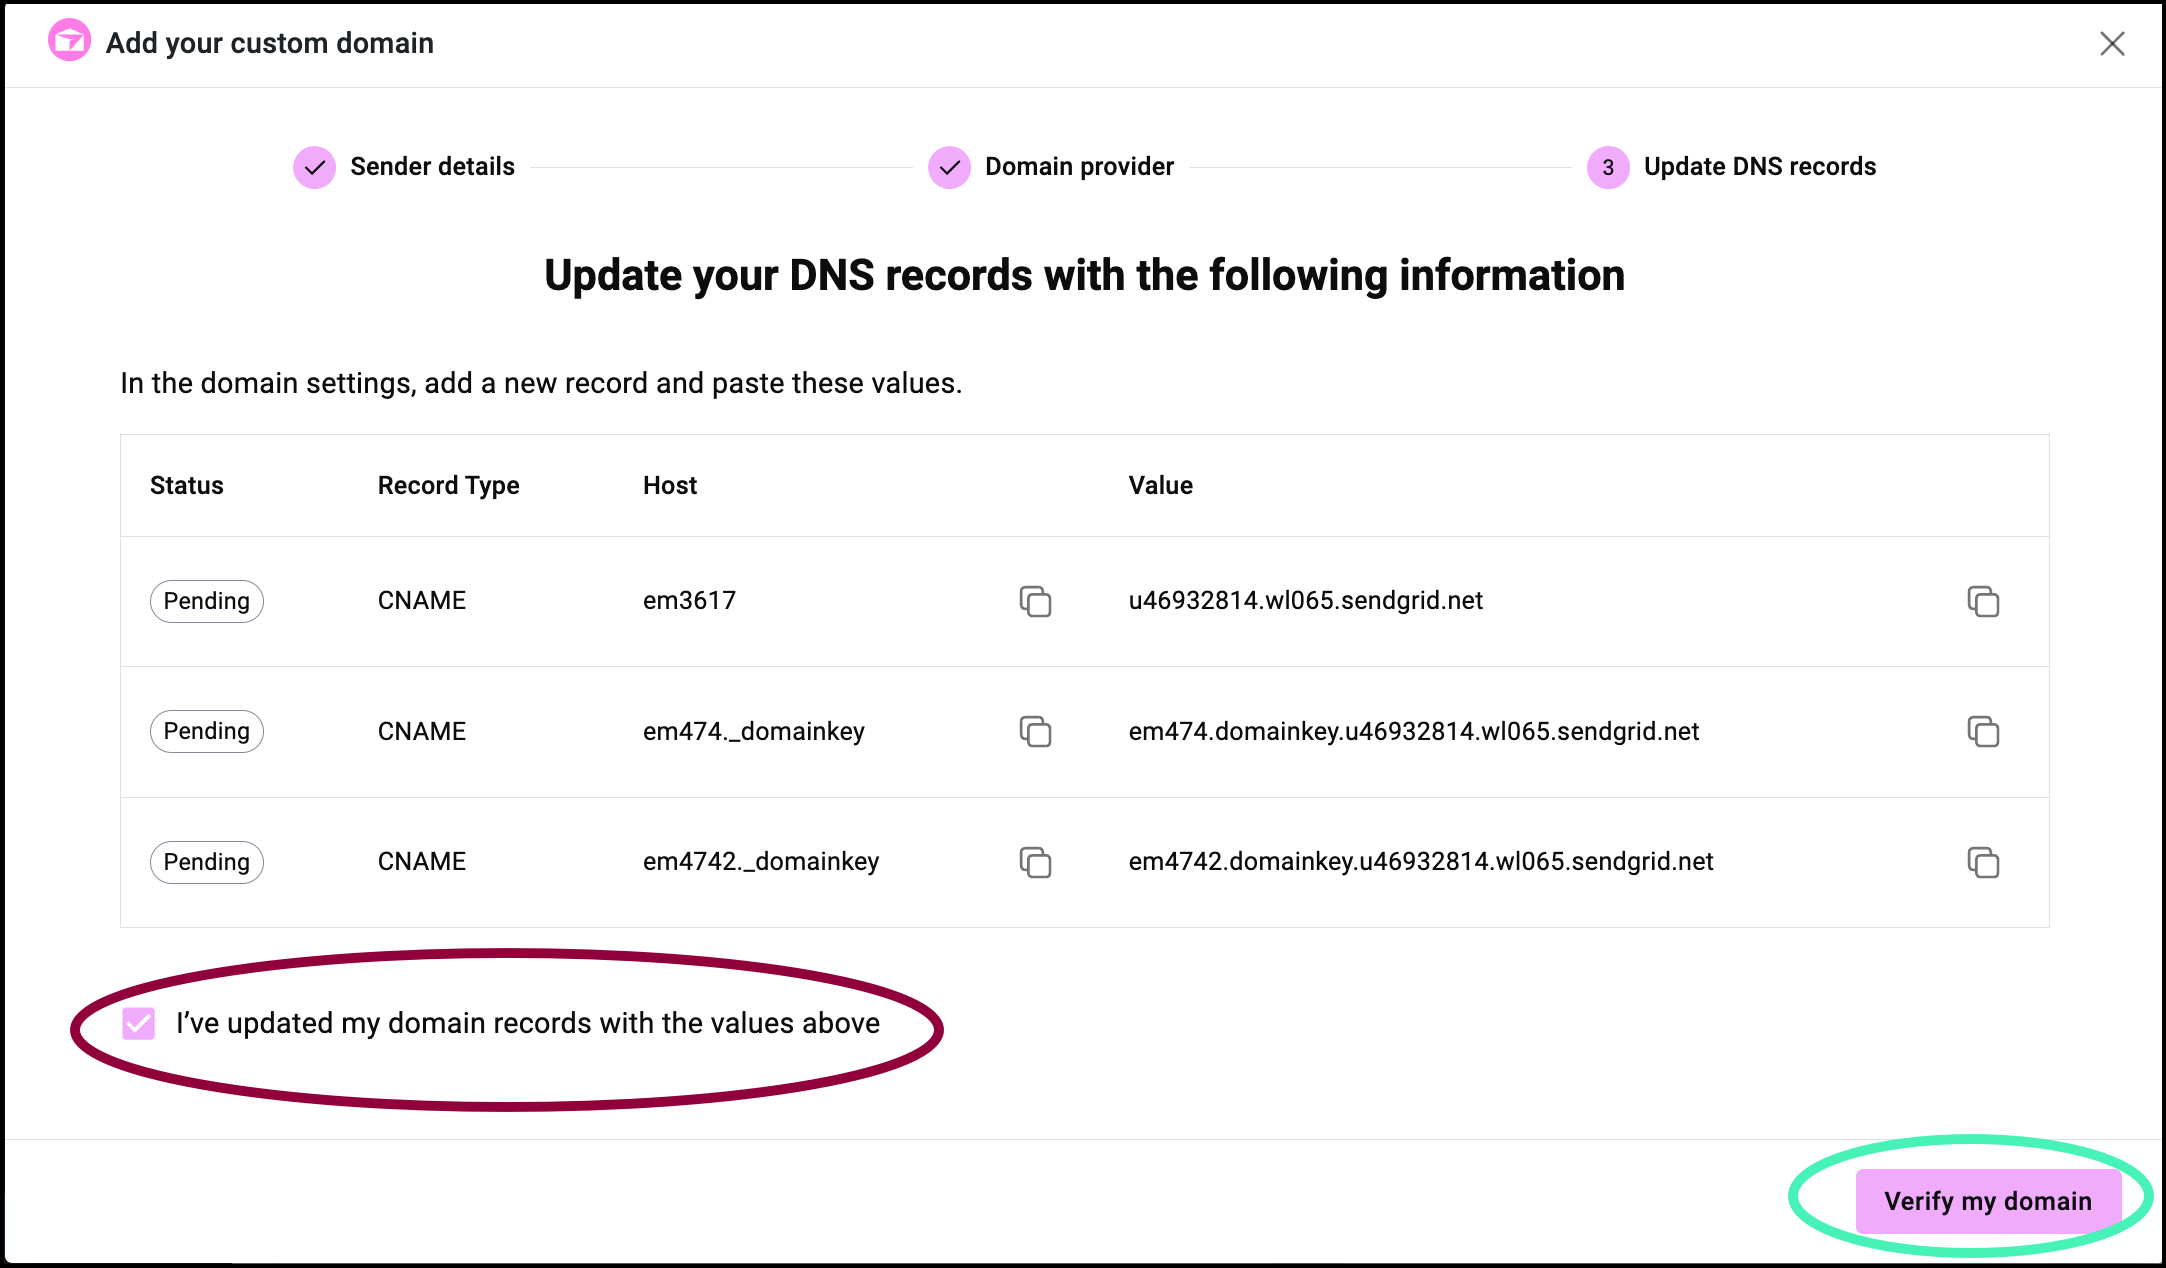
A list of addresses appears.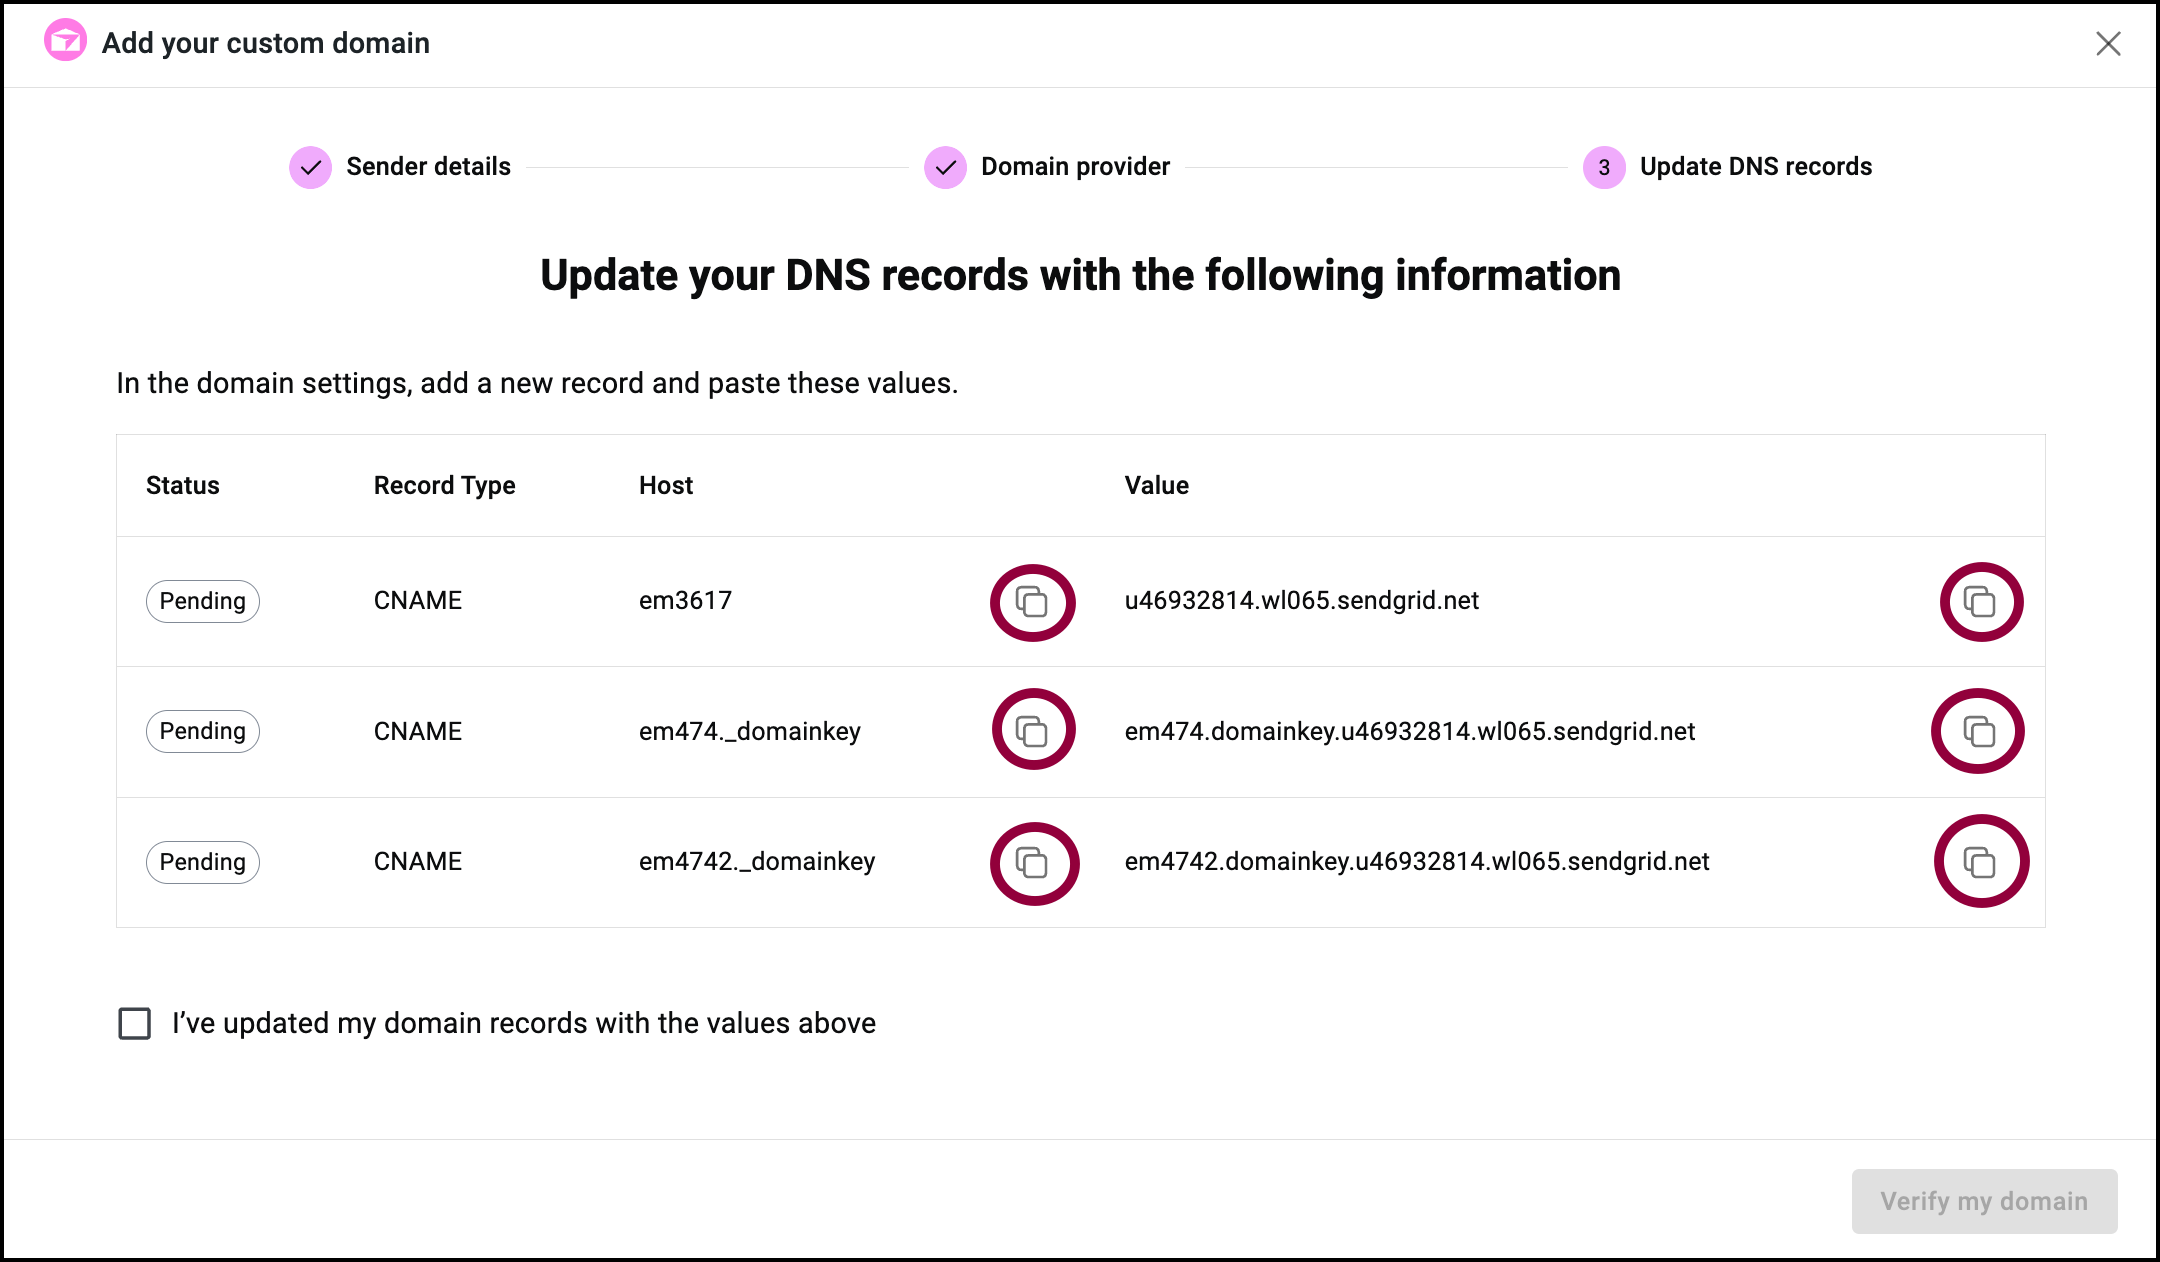
- Use the copy icon
 to copy the Host information and the Value from Site Mailer.
You may have to scroll to copy the Value field. - Return to the tab with your domain name provider and create a new CNAME record.
- Paste the information you copied from Site Mailer into the new CNAME record.
Note: In some domain name providers the Host value is the Name of the record and Value is called the Target. - Keep copying the information from Site Mailer to your domain name provider and creating CNAME records until you’ve copied all the entries.
Note: If your domain name provider allows CNAME records to be proxied or have a DNS only setting, they must be set to DNS only.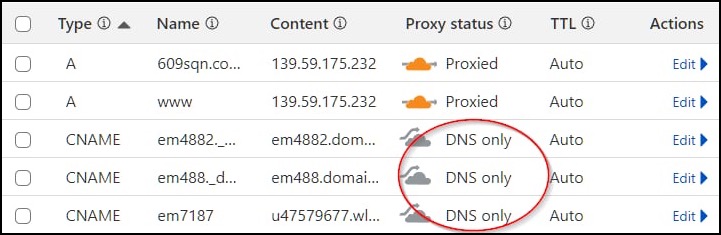
- When finished, check I’ve verified my domain records with the values above and click Verify my domain.
Note: It may take up to 72 hours for the process to finish.
After verification, your Site Mailer emails will now use your custom domain as their address.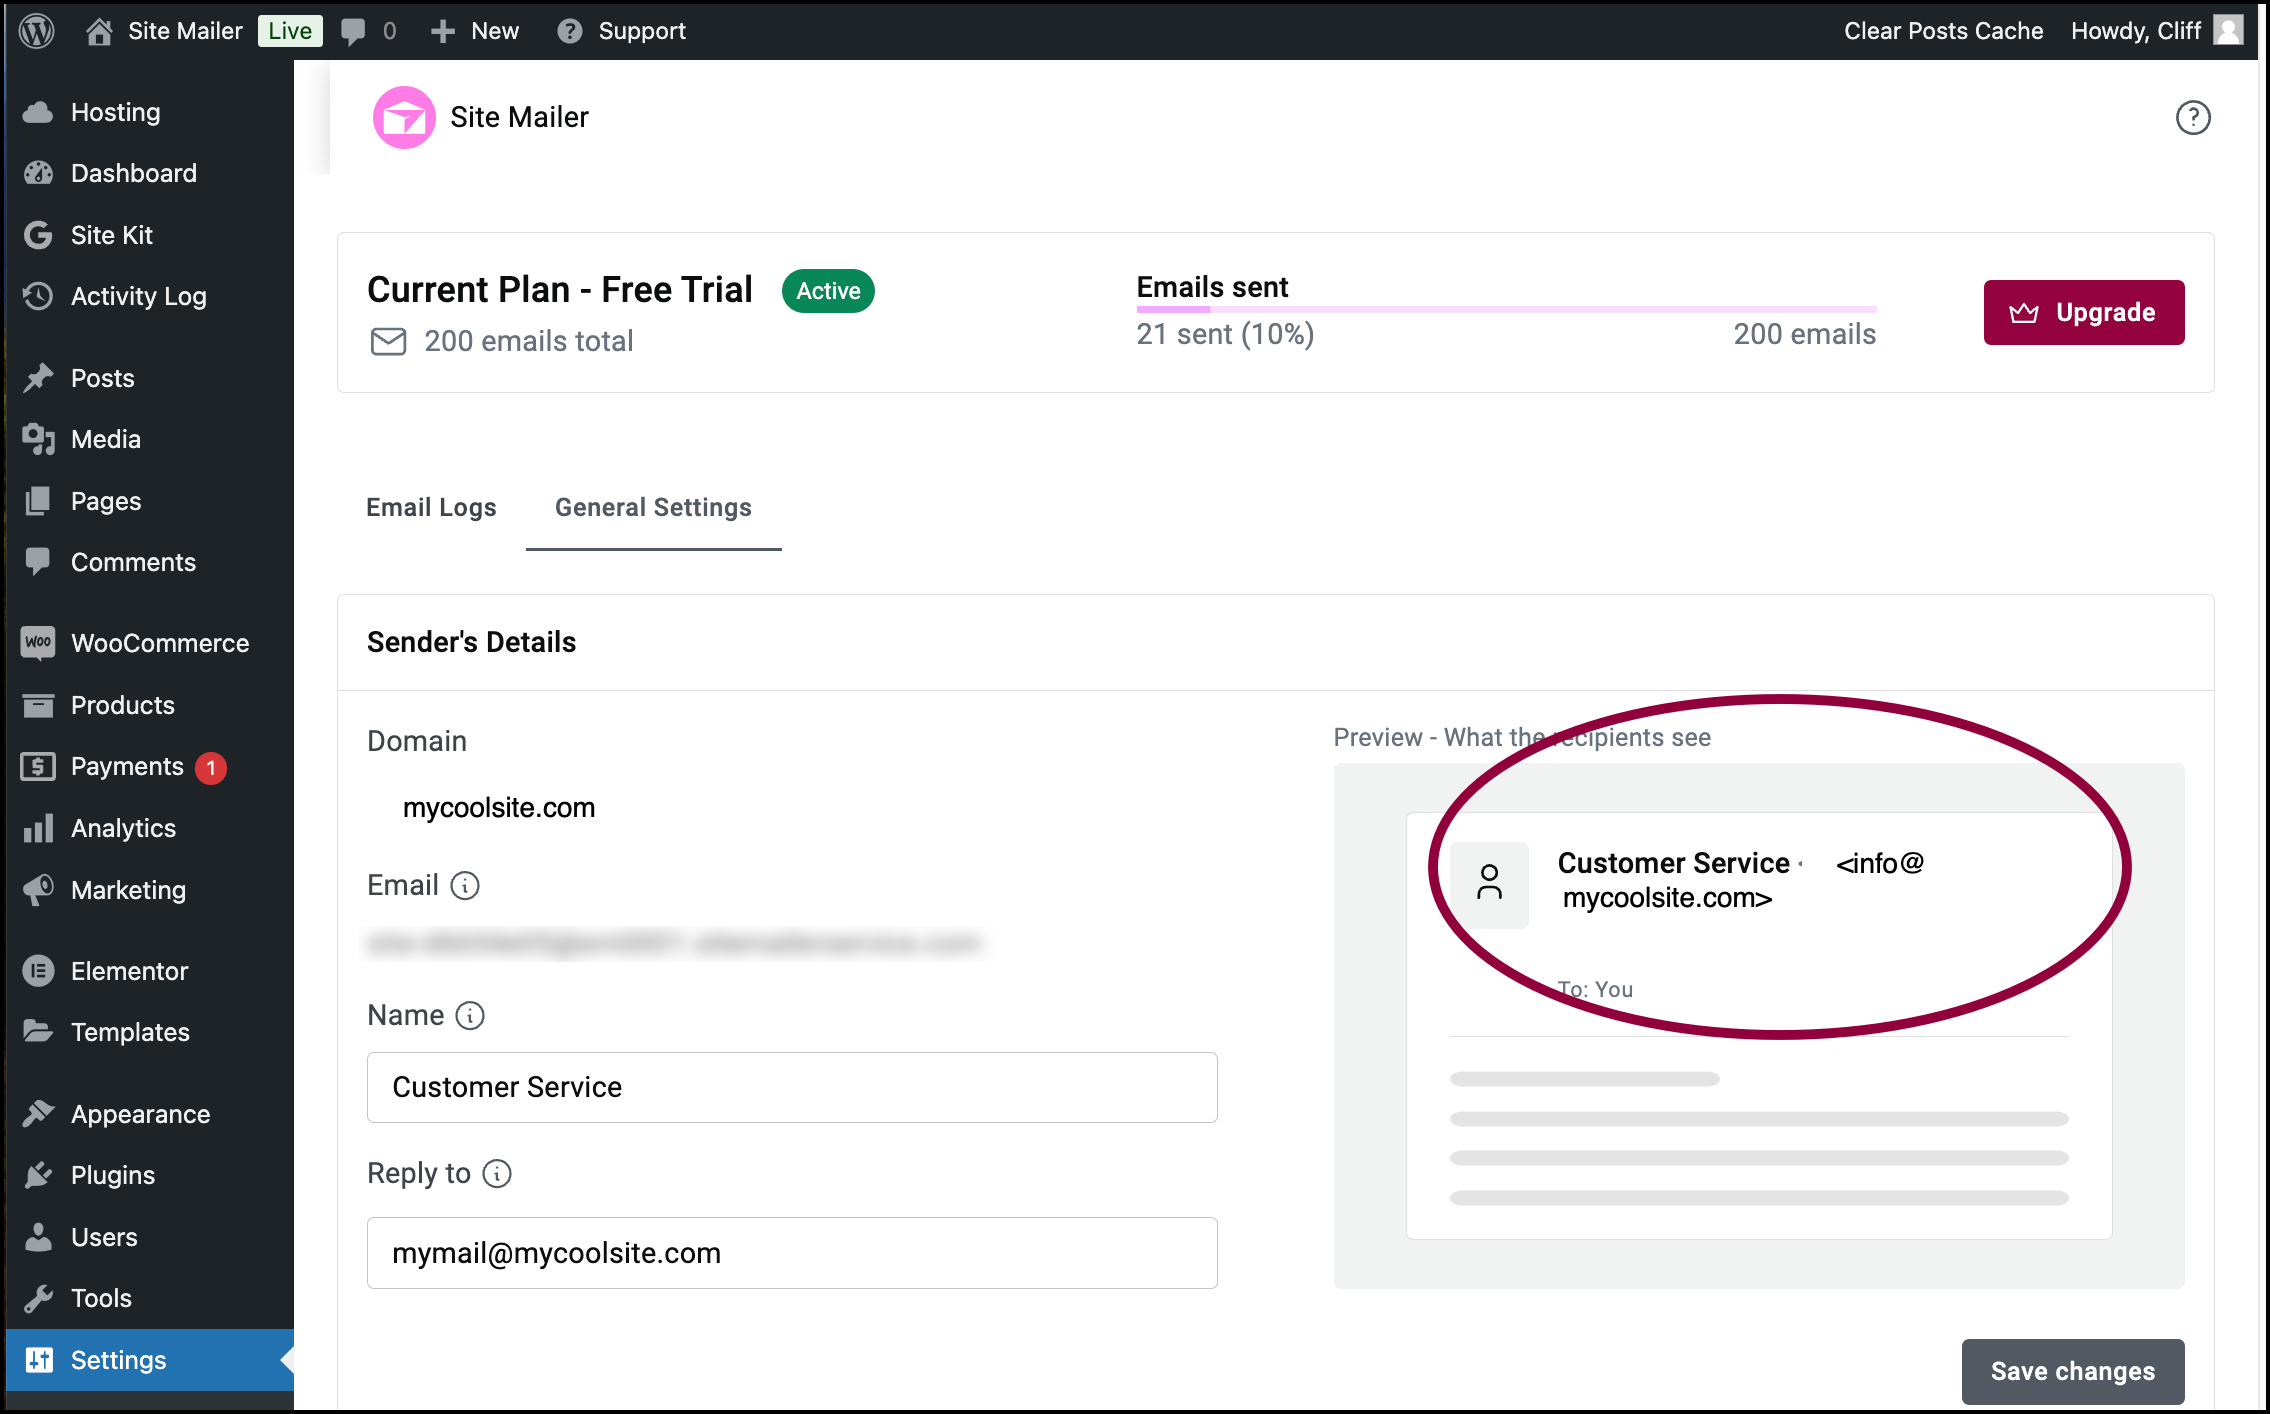
You can confirm this by checking the domain section of Sender Details in General Settings.